
Connecting Xero
Before You Start
You will need the following before connecting Xero:
- An active Xero account for your business (not a demo or trial)
- A CSM account on the Pro plan — accounting integration is a Pro feature
- Admin access to your CSM account (Owner or Admin role)
Step 1 — Get Your Redirect URL from CSM
Before going to Xero, grab the redirect URL CSM needs you to register. You will paste this into the Xero app in the next step.
- Open Account Settings Log in to CSM and click your shop name in the top navigation, then choose Account Settings.
- Go to Integrations → Xero Find the Integrations section and click on Xero.
- Copy the Redirect URL CSM shows a redirect URL built from your live domain. Click the copy icon next to it and keep it in your clipboard — you need it in Step 2.
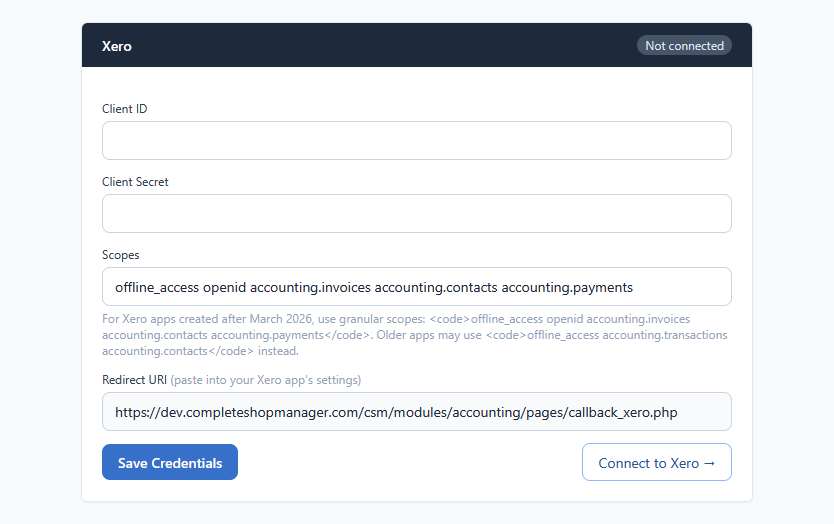
Step 2 — Create a Xero App
Log in to the Xero developer portal and create a new app. Xero uses this app to issue credentials that CSM uses to connect on your behalf.
Open the Xero developer portal: https://developer.xero.com/app/manage
- Sign in Use your regular Xero account email and password — the same one you use to log in to Xero for your business.
- Click “New app” You will see a button in the top-right corner of the My Apps screen.
- Fill in the app details
- App name: anything you like — e.g. “Complete Shop Manager”
- Integration type: Web app
- Will you use Xero data to train, fine-tune, adapt, or enhance an AI model? either “Yes” or “No”
- Do you understand and agree to meet XeroU+2019s minimum security requirements? “Yes”
- Company or application URL: your shop website URL (or https://completeshopmanager.com)
- OAuth 2.0 redirect URI: paste the URL you copied from CSM in Step 1
- Agree to the terms and click “Create app”
- Generate a client secret On the app detail screen, go to the Configuration tab and click Generate a secret. Copy the secret immediately — Xero only shows it once.
- Copy your Client ID It is shown near the top of the Configuration tab. Keep both the Client ID and the Client Secret handy.
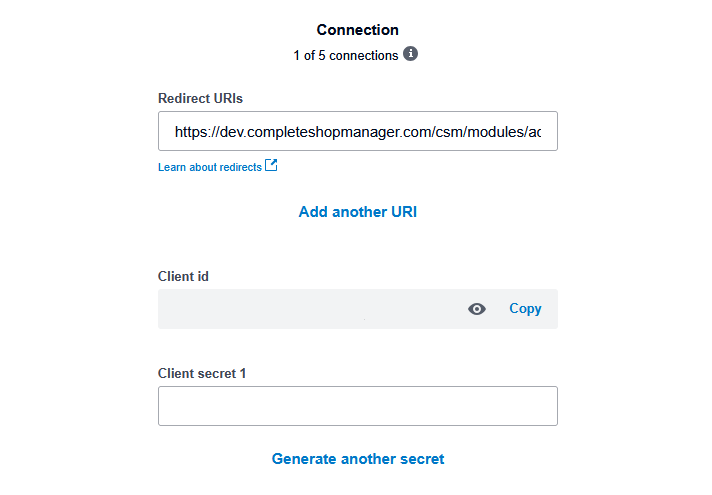
Step 3 — Connect Xero in CSM
Go back to the CSM Xero settings panel you opened in Step 1.
- Enter your Client ID Paste the Client ID from the Xero app into the CSM field.
- Enter your Client Secret Paste the secret you generated.
- Click “Connect to Xero” CSM redirects you to Xero for authorization.
- Approve the connection in Xero Xero asks which organization to connect. Select your business and click Allow access.
- Confirm the connection CSM redirects you back to the settings page. You should see your Xero organization name displayed — that confirms the connection is live.
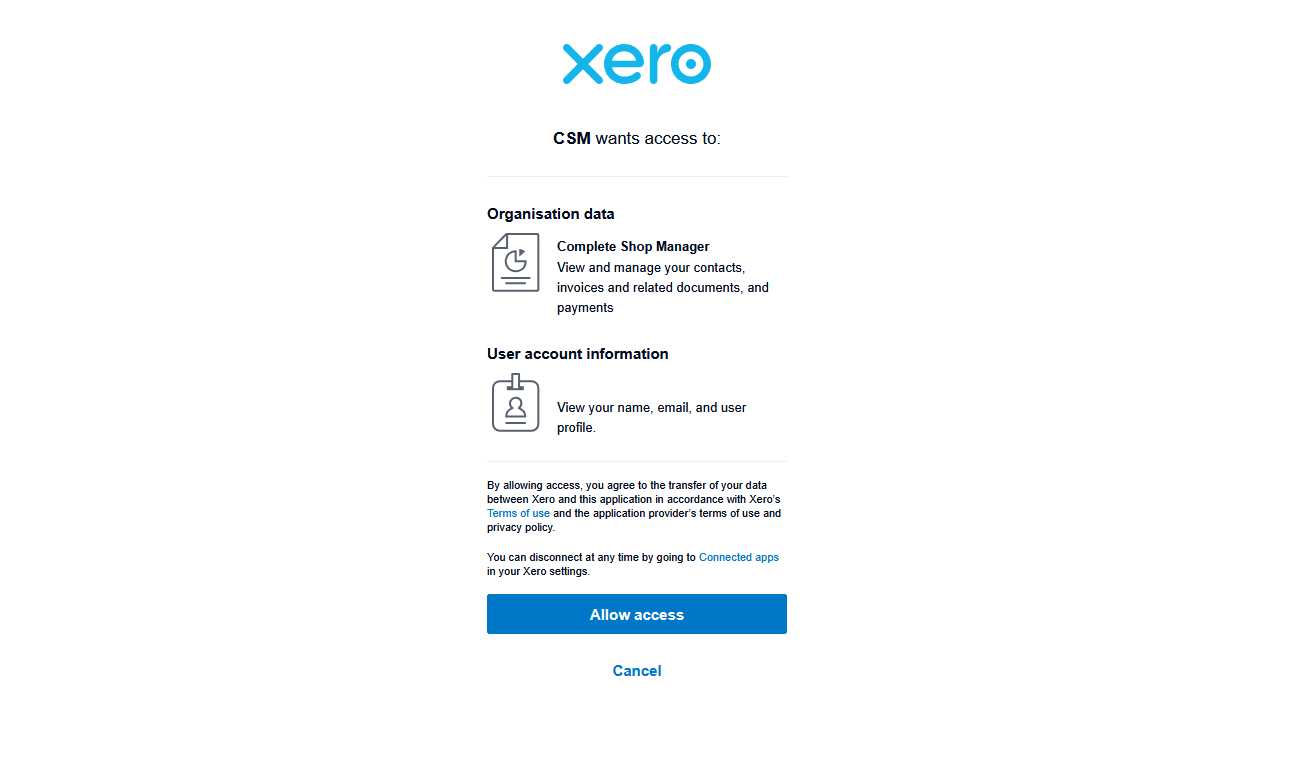
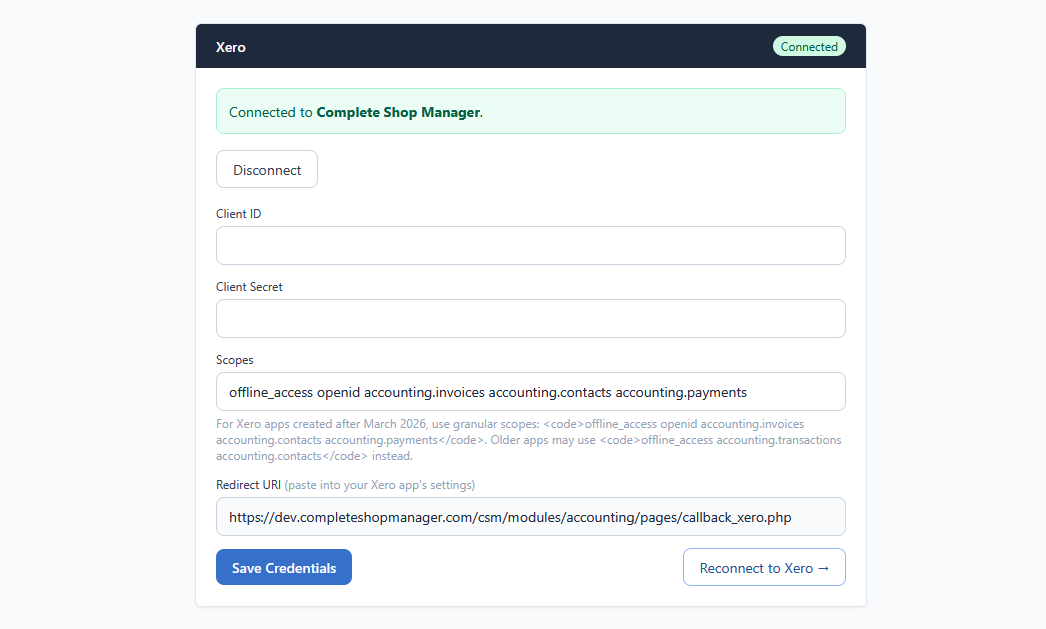
Step 4 — Set Xero as the Active Provider
Connecting Xero does not automatically start syncing jobs. You also need to set it as the active provider so CSM knows where to send invoices.
- Find the “Active provider for sync” setting It is on the same Integrations page, below the Xero and QuickBooks panels.
- Select Xero and save.
Troubleshooting
“Invalid redirect URI” error in Xero
The redirect URI in your Xero app must exactly match the URL shown in CSM — including the protocol (https://) and no trailing slash. Go back to the Xero developer portal, open your app, and check the OAuth 2.0 redirect URI field on the Configuration tab.
Organization name does not appear after connecting
Reload the Integrations page. If it still shows as disconnected, the client secret may have been typed incorrectly. Click Disconnect, re-enter both credentials, and reconnect.
Xero asks me to upgrade my Xero plan
The integration uses Xero’s standard Invoices API, which is available on all paid Xero plans (Starter, Standard, Premium). Xero trial accounts can connect but have a 20-invoice monthly limit on their end.